Thursday, 30 June 2011

My Coin Bra!


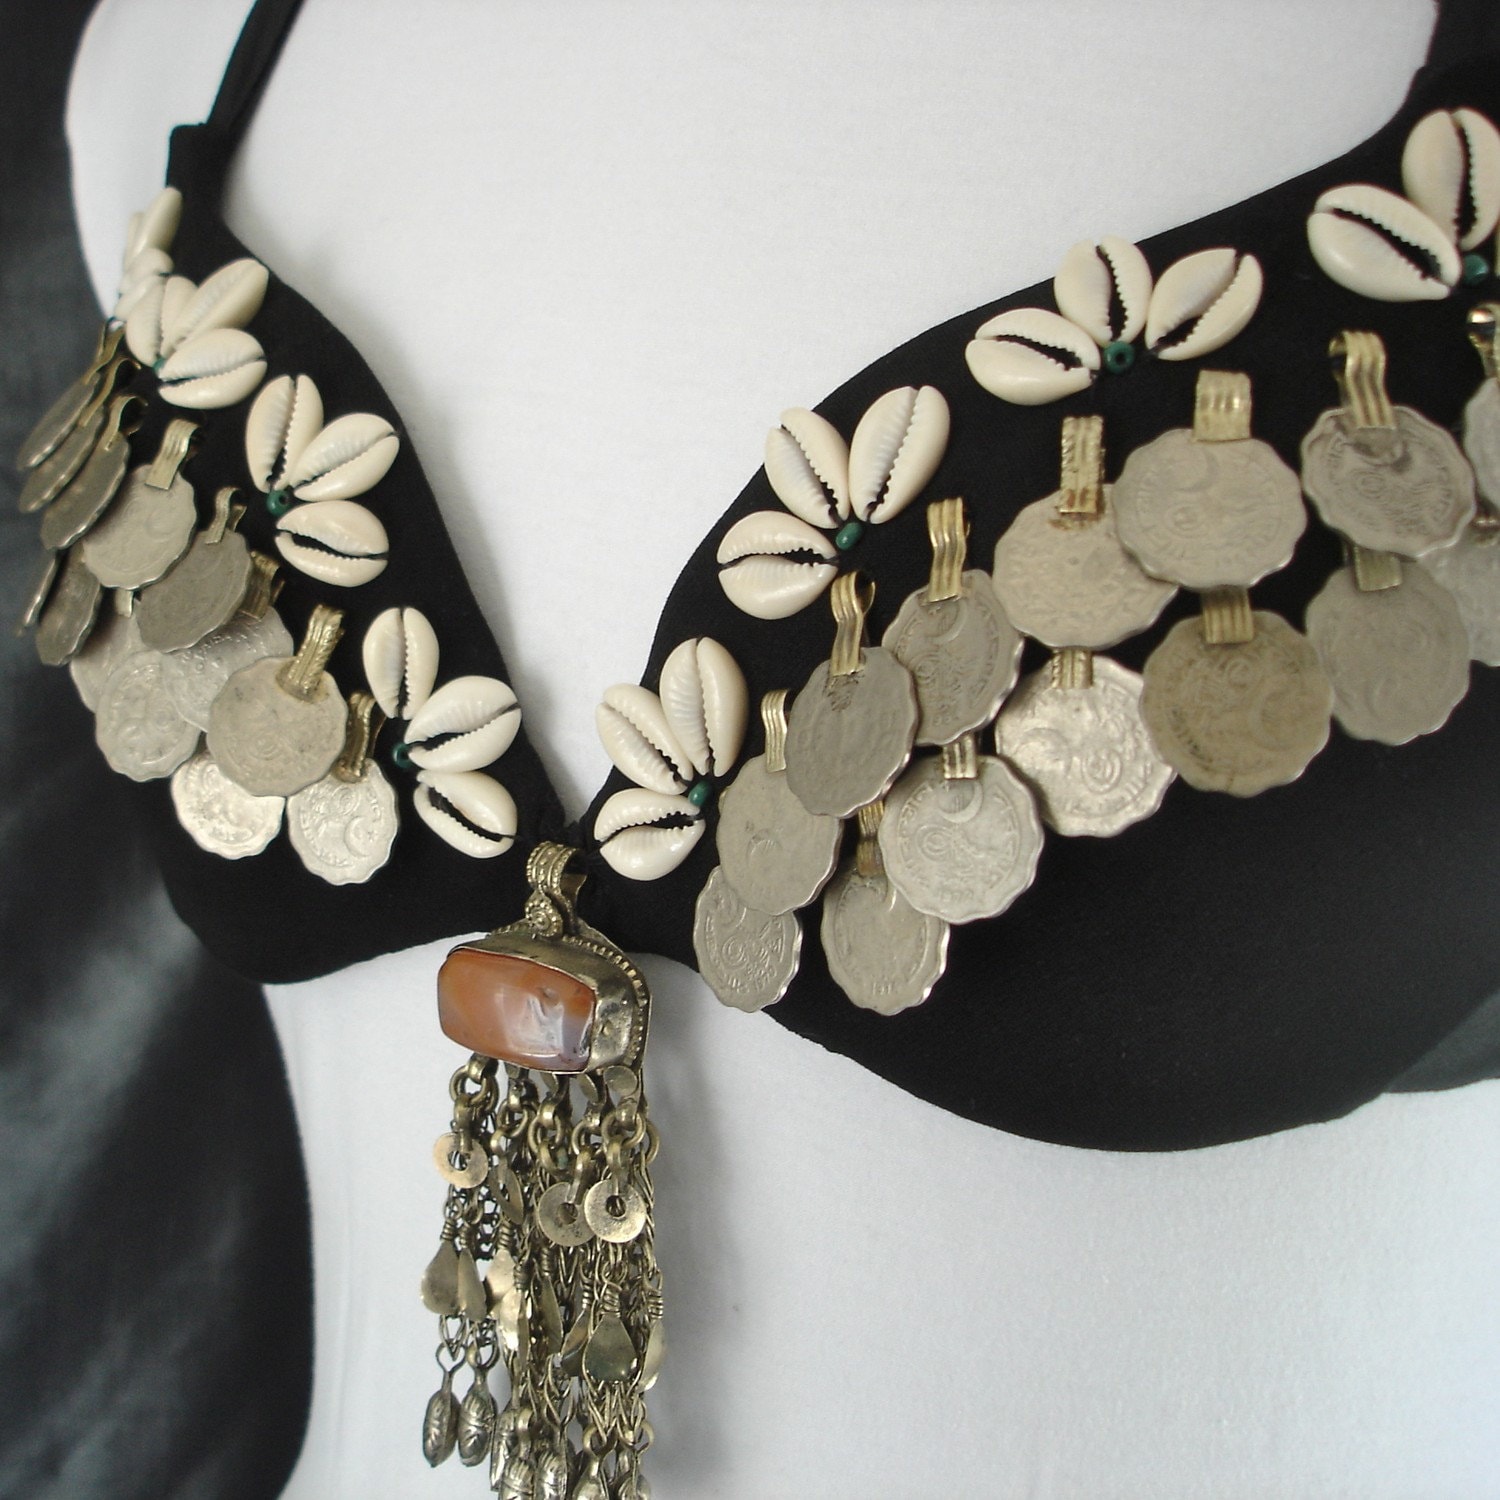
So for my birthday this year, my mom got me some coins. I was so pleased! I planned on starting a coin bra this fall, as I had so many other projects that needed finishing. 

Fast forward to this past Sunday. 

Suddenly it seemed completely necessary to make a coin bra in time for the Hafla on Wednesday! So, I bought some fabrics and thread from Fabricland after work on Monday and began the work! It took about 5 hours Monday, and maybe an hour or so on Tuesday. 


This is what I had to start off with:
  • A black bra that had broken between the cups (around $25 originally)
  • Bag of coins (gift)
  • Black stretchy fabric ($3-4)
  • Burgundy fabric ribbon ($2)
  • Black thread and sewing needle ($1)
  • Cowrie shells (recycled from Value Village - $2)
  • Pendant (gift)


Here is what I did (I was so focused I forgot to take any pictures of the process!!):
  • Sewed my broken bra back together!
  • Cut a strip of fabric to cover the length of the bra, both cups and have extra on each end for tying
  • Cut the fastenings and shoulder straps off the bra
  • Sewed the black fabric onto the bra, cutting off excess as I went
  • Cut pieces of the burgundy and sewed it on
  • Sewed on the burgundy straps
  • Sewed on the cowrie shells
  • Sewed on the coins and pendant
Tadaaaa!!!


Now this was fine enough for me to wear to a Hafla with my fellow student dancers, but believe me when I say this coin bra is only half finished! I plan to cover the cups with more coins and jewels, add chain to the bottom, and more jewels or decoration to the burgundy stripe on the cups. If you have any ideas let me know in the comment section below!


So there you go, my first coin bra!! Hope you like it! :)

(I'll post some pics of the Hafla tomorrow so that you can see what it looked like on!)

Wednesday, 29 June 2011

Coin Bra - Inspiration

Coins, cowries and kuchi. How we love coin bras :) Here are a few pics I found, I think they each have a few good ideas that we can use when making our own. I recently made one of my own, so I will be sharing pictures of that tomorrow!


I love the shape of this bra, and the silver ribbons at the top and middle of each cup.
I like the use of black space around the silver to really make it pop and emphasize the line.


Love the use of kuchi pendants cascading down the cups. Can you imagine a shoulder shimmy with this one? The 'dangly bits' would probably jump out an inch or two!


This one is quite nice, lots of coins, jewels for some colour and the chains on each side are nice as well. Normally I wouldn't be crazy about the lace/eyelet bra top coming through but it's not too lacey or obviously part of the bra - even looks like maybe it was added - either way it works. This one is my favourite!


Peacock feathers! Why not, they're beautiful!


I love the gold and red ribbon between the cowrie lines.


Simple and clean, nice coins and kuchi pendants.


Interesting way to display the cowrie shells, and adding a pop of colour with the beads as well!

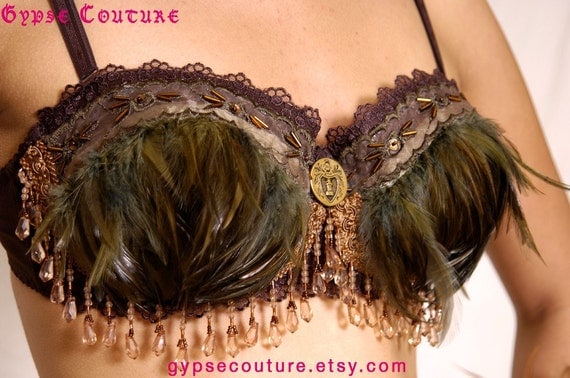
WINGED DELIGHT - Feather adorned bra with beads and a Medieval coin emblem

More feathers! Now this isn't really a 'coin' bra persay - however might be nice for tribal fusion? I think feathers could work on a coin bra, in small amounts.


What do you think? What are your favourite types of coin bra or favourite details? Or pet peeves? Please share your thoughts :)


Monday, 27 June 2011

Style Inspiration: Steampunk

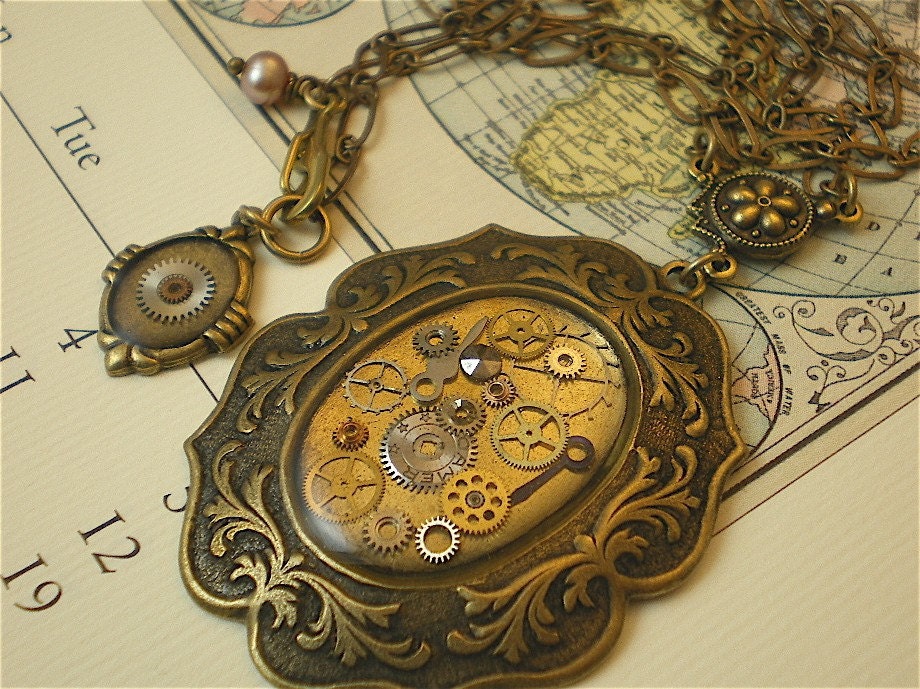
Steampunk seems to be showing up more and more frequently. I recently discovered it through Etsy, and after wondering why old gears were appearing on everything entitled "Steampunk", went right to Wikipedia.

In a nutshell, they explain it as a fusion between steampowered, Victorian era Britain, and futuristic technology. Steampunk has only been popular for maybe 30 years, but never so prominent as now.

Style always has many inspirations. Why not Steampunk as well? No one is alike so you might take away something different than I do from these pictures, or you might hate it altogether. That's fine, leave a comment as to which styles you'd like to see and they'll be next! I think just about anything is worth having a look at. Then it is up to the individual to decide what they will take or leave.  Anyways, too much talking, lets check out some pics ;)


So there you have it, beautiful Victorian inspired fashion with a technological twist.
  • Corsets, goggles, boots
  • Straps, buckles and laces
  • Gears, wires, tubing and other mechanical bits
  • Skeleton keys and timepieces
And yes, I realise Steampunk is not very 'tribal'. However, some tribal fusion dancers are using facets of this style in their costuming, and this blog is for EVERYONE. :) I myself am an ATS dancer and probably won't use any of this in my dance costuming - but I still enjoy having a look and getting ideas for my own personal style :) And if you do enjoy steampunk, you're in luck as I have some simple jewelry tutorials to come!

Wednesday, 22 June 2011

Shopping Spotlight: Sihaya Designs


 As you know from previous Shopping Spotlights I'm always on the look-out for the most unique, beautiful, quality creations to adorn us dancers. When I stumbled across Christina of Sihaya Designs on Twitter and had a look at her shop I was immediately in love! I think you will be too. Her designs are whimsical, charming and sophisticated. She was also kind enough to share a bit about her work! Please read her interview below:

How did you get started?

I started making jewelry in a serious way about four years ago. I needed a creative outlet, and I've always been a kind of a magpie.  I was also in a job where I was not being creatively fulfilled in any way, micro-managed within an inch of my life.  I felt stunted and anxious all of the time. I knew that I needed to have a job that meant something to me, that brought me joy, one of those things in my life was making jewelry. One day I had enough, and three years ago, I made the leap to full time artisan.  It's been tough at times, but I never regret that decision.

Where do you do your creating?

I create in my home studio.  I have a separate room where I keep all of my supplies, a big desk, an inspiration board, and an altar space, as creating can at times be a sacred act for me.  I've decorated in bright colors-- purple sari curtains edged in gold-- and generally try to keep the vibe as comfortable and conducive to creativity as possible. 


 What inspires your designs?

As a Pagan, I am deeply inspired by nature.  Many of my pieces reflect the changing of the seasons, or the magic of the moon, the stars, the woods.  I'm also entranced by faery lore, so many of my pieces also have that as a clear inspiration.  I love winged things!  I like to create jewelry that is both modern and whimsical-- for the customer who chooses their jewelry to express the magic that is already inside of them.


What music do you like to listen to while crafting?

I tend to have costume dramas on in the background while I work-- looking up periodically helps me to refocus my eyes and combat fatigue.  But sometimes I listen to music, as well.  It tends to be things where I don't have to pay close attention to the lyrics, so I can just let the music wash over me to create an atmosphere.  Loreena McKennitt, Woodland, The Mediaeval Babes, Massive Attack, Gaelic Storm, Great Big Sea, Lisa Gerrard & Dead Can Dance, and of course a lot of bellydance-able music-- Phil Thornton, Solace, Azam Ali & Niyaz, Beats Antique.


How long have you been dancing?

I've been dancing for about five years.  I started out in swing and ballroom-- partnered dances where I was always being led.  But I was really looking for the joy that comes with collaborative dance, where I could lead and follow, and create something with my fellow dancers.  A friend invited me to a bellydance class, and I wasn't so sure about it.  But after a class, I was totally sucked in!  I fell in love with the movements that helped me to accept and love my own body, and the warm energy and smiles of my classmates-- many of whom I still dance with to this day.  My journey began in a sort of tribal fusion, but now is mostly ATS in the Fat Chance Bellydance tradition. I still perform a little bit of fusion, but for the most part, ATS has stolen my heart.


Christina is a beautiful dancer and talented artisan, a big thank-you to her for sharing her gifts with us. :)


Now if you'll excuse me I have to go check out that music and do some shopping at the Sihaya Designs Etsy store! Are you coming? ;)


Christina is always looking for more Twitter friends to chat with!  You can find her at http://www.twitter.com/sihayadesigns. Her blog is http://sihayadesigns.blogspot.com/. Also, if you're in the MidAtlantic area of the East coast and are interested in ATS (among other styles), you can check out one of her troupes, the Transcendence Tribal Bellydance Collective, over on Facebook http://www.facebook.com/#!/TranscendenceTribal


Disclaimer:  
I have not yet ordered from this merchant and am in no way affiliated or in business with Sihaya Designs. I just like shopping. ;)

Monday, 20 June 2011

Dancing Journals

  Have you ever used a journal? Most people have. There are so many ways to utilise them! Diaries, food journals, fitness journals, writing poetry or prose, journals to record vet records or baby's first moments, a bodybuilders reps or a gardeners notes.

  Journals are devoted to important parts of your life, to record things and save them for future use - whether for entertainment, sentimental value, or to increase a knowledge or skill.

  I've been using journals my whole life. When I started dancing and my teacher suggested using a journal, putting the two together came naturally for me. However, if you're not journal crazy and nuts for stationary like *some* of us, here are some helpful tips!

  • Use your journal by date. Record any class/workshop/practice and take notes. Who is teaching? What is the focus? What key points do you need to remember or work on? What have you improved upon? Write down any questions you have to ask at the end of the class. You could even include a blank page at the end to glue in a picture from the workshop.
  • Use your journal by move. Alphabetized, categorized by fast/slow or by levels, whatever works for you. Write a brief description of the move and then as you learn more from teachers take notes for each one specifically. If a good metaphor is shared, one that really helps you feel the move, write it down! If the teacher mentions something about posture you keep forgetting, write it down!
  • Use your journal as a scrapbook! Include concert and workshop tickets, notes from fellow dancers, diary entries, music playlists, funny stories - anything that will be fun to look back on!
  • Don't think your memory is better than it really is. We say "Oh I don't need to write this down - I'll remember it" - and then lo and behold we forget! This has happened a lot to me, am I the only one?Write it down!!! ;)
  I'm sure there are many more ideas, themes and lay-outs you could use for your journal. If you don't have one, you might want to have a look at the different options you have before purchasing one. You might take into consideration your budget, the number, size and quality of the pages, the features, and of course, it has to be preeetty so that you want to use it!

  Now a little bit about my own journal as an example! I use Moleskines for most of my journals. My absolute favourite is their sketchbook, which I use as a diary. Their agenda's are also great!


  However I wanted to list the ATS moves and have room at the end for other things, and no Moleskine had enough pages. I had to resort to looking outside of the Moleskine realm. That's when I found this little beauty:


Isn't she lovely? Made by 'Mudlark' this little journal dubbed 'Kiko' was $14.99 at a Chapters store in Canada. You can also get her (and her beautiful sisters) online <<here>>.

It has a CD shaped pocket in the front to keep music or notes:


And the pages are all decorated just as extravagantly as the outside, with a special place for the date/move as well!


Okay, so my plan for this journal is to list the moves alphabetically by fast/slow and take notes on each of them. I also have extra pages at the back to include other details - like which moves are folkloric, which moves are in the Shimmy family etc. I hope it will be a great tool for learning!

And how fitting is the quote in the back, hmm?


If you are interested in learning more about how to use a dance journal, please leave a comment below or email me at thetribalway@gmail.com and I will post more about it soon, based on your questions!

Have a wonderful day!


Friday, 17 June 2011

Dance Flash Cards Tutorial

As a student of ATS, I'm always looking for ways to make my at home dance practice more fun and efficient. A fellow dancer said she had made flash cards to aid in her practice, and I was intrigued. She explained it to me and of course I made my own set!


Equipment:

- List of dance moves (for ATS list click here)
- Stack of index cards
- Black pen or computer/printer/glue
- Coloured pens/highlighters

Instructions:

1. Either type, print off and cut out each dance move, or write them on each card. My index cards had one side lined and one blank, so I used double sided tape to fix my words to the blank side. One move per card.
2. To distinguish between fast and slow moves, I highlighted the edges of my cards. Yellow for slow, pink for fast. There are endless ways you could do this. Using any colours you wish, you could outline the cards, do designs, or use two different coloured index cards altogether.


Ways to use these cards:

- mix them up and randomly pick a few to put together in a song
- put them in alphabetical order and work through practicing each move, or mix up the order each time
- randomly pick 1-3 cards and drill them, focusing on posture and angles, or on smooth tranisitions (then remove these from the main pile so they are not picked again until this has been done with all the moves)
- randomly pick 5 moves and choose exactly what order you think they would look best to dance in
- if you are at an airport, on the bus etc use them as a tool for visualization
- add notes or pictures on the cards, and after doing a move, look at the back and quiz yourself to see if you remembered every detail of posture, movement, gaze etc

Happy Practicing!

Thursday, 16 June 2011

Hip Mix A-List

So, The Tribal Way is offically Hip Certified!


   I'm sure you've all heard of HipMix.net, a website devoted to belly dance. They have everything a girl could want, from intriguing articles to event listings to shopping! YES I said SHOPPING!! :)

   Hip Mix has one page for their A-List Blogs, and guess who is on there now? Yours truly! This is a great way for us all to meet more like minded people. They have other blogs listed on there too, go have a look!

Thanks Hip Mix!


Wednesday, 15 June 2011

Tassel Tutorial

I am an ATS dancer and I have big love for tassels. Working on a new tassel belt, so I thought I'd share a quick tutorial!!! I know most of you are probably well versed in tassel making, so if this post is completely boring then simply feel free to drool over this yarn. Check out these colours:


Are you not IN LOVE with that purpley bluey colour? It's okay if you're not, I love this yarn enough for both of us. That shimmery green too! So excited for another tassel belt!

Okay - back to the tutorial!! So all you need are some scissors, some sort of measuring object to wind yarn around, and of course, some yarn. (Mine was purchased at Michaels for about $5 each).


So grab your yarn, and something flat to wrap it around. It's better to choose something sturdy - not a bendy shoebox lid like I used! DVD or CD cases work well.  You can even make your own with some wood or cardboard. 


Now start wrapping! The length of each side of the wrap will be the length of the tassel.  If you want your tassels to be uniform in size, it's best to count how many wraps you make. Brave people estimate when it looks 'right' to them but I'd rather be certain. 


Now snip your yarn! Then take a piece and weave it under the yarn loop.  


Tie it up! Then cut the yarn at the other end.


Now you can see the tassel starting to shape up!


The last step is to cut a piece of yarn and tie it around the tassel, making a 'head' so to speak. You can tuck the ends right into the tassel head or tassel fringe, depending on how long they are. This is also when I give my tassels a trim at the bottom so the ends are even.


Repeat until you have all the tassels you need!


If you want to go a bit farther, you can wrap a different colour yarn around the top, or some beading or other adornment. It's also popular to make mixed colour tassels by doing say, 40 wraps of one colour and 10 of another, or just use a whole mish mash of textures and colours. Wherever your creativity leads you!

Happy tassel making!!

Tuesday, 14 June 2011

List of ATS Moves

Sometimes a complete list is hard to find, so here it is, in alphabetical order! Apparently Carolena has recently approved more moves, but they will not be taught until they come out in the next instructional DVD.

* = level one ** = level two

Slow moves:

arm undulations *
barrel turn
belly flutters
belly rolls
bodywave *
camel walk **
circle step *
corkscrew turn **
floorwork
floreo *
head slides **
laybacks
puja **
propeller turn ** 
reverse turn **
ribcage rotation **
reverse taxeem **
sahra turn
taxeem *
torso twist *
walking bodywave **
walking taxeem **
wrap around turn

Fast Steps:

arabic *
arabic hip twist **
arabic orbit
arabic shimmy **
   w/arms and turn **
   w/arms and turn and fade and circle
arabic 123
arc arms **
double back w/half turn
double bump **
chico four corners
egyptian step *
  w/ half turn *
egyptian full turn
ghawazee shimmy combo **
pivot bump-choo choo *
   w/ arm 1, w/ arm 2 *
reach and sit **
re-shamka
reverse shimmy
shimmy *
shoulder shimmy-hip drop combo **
single bump **
   w/half turn
spins
sunanda
turkish shimmy **
   w/quarter turn + half turn **
turkish shimmy
   w/arms and turn
   w/arms and circle
up2 down3 **
waterpot
   w/half turn+flourish
wet dog

 
The beautiful and talented Manhattan Tribal

Monday, 13 June 2011

How to be PERFECT.

If the title of this post was accurate, I wouldn't be writing anything. This post would be empty.

I don't know how to be perfect, and frankly it sounds awfully exhausting doesn't it?  To execute perfectly every action, every role we play, every task and practice that brings us closer to our dreams... nah, I can't do it. I'm not cut out for it. Are you?

What I know we can do, however - with a little self-discipline - is to strive to do a little better than we did yesterday.

We can push ourselves a bit further. Let one less negative thought into our heads, one less sugary treat into our mouths, and less lazyness win us over. We can choose to practice isolations and drills for longer, or stretch farther. We can choose to eat blueberries and carrots for snacks instead of sweets. We can choose to think lovingly and forgive someone who has hurt us rather than try to bring them down, or let our anger ruin our day.

Even one little thing, one tiny improvement in one area, is enough to make the day a success.

Don't compare yourself to anyone else. Be stronger. Choose better. Forgive yourself for what you don't do, and push yourself to make the changes necessary. What will you improve today?

Enjoy your small successes :)

And don't bother with 'perfect'.

Sunday, 12 June 2011

Thursday, 9 June 2011

A Very Sweet Birthday

For my birthday yesterday, my boyfriend made me a belly dancer cake! I was very touched by the thought and effort he put into this. He learned some valuable cake making lessons too, like how red is one of the hardest colours to recreate with icing!  The pink turned out very cute though I think! The decorations are from a dollar store princess necklace. The squares you see over the 'bra' are the candles. And yes, it was very yummy!! (Thank-you my love!)


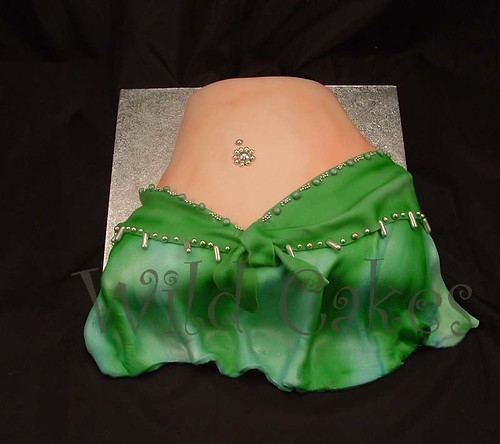
Anyways I thought it was such a sweet idea that I'd include some more belly dance-themed cakes to inspire your creativity. Then when it's time for you to celebrate the dancer in your life, maybe you can make her day with a perfect cake as well!